
Gun Soul
Old Skool Demo Plasma
Hello and welcome back to another Gun Soul devlog. This time we’re going to talk about one of the gfx effects I use on the title screen and which I’m particularly pleased with.
If you would rather watch a video than read the rest of this article then here's a link to a YouTube video version of this devlog:
Still with me? Ok, let's continue...
If you look inside the ‘Gun Soul’ lettering on the title screen you’ll see a swishy moving pattern which only moves within the boundary of the lettering. How was this done? Black magic? No - it’s a simple alpha channel trick like a cookie cutter couple with an old school demo effect effect called a ‘plasma’. Never seen one of these before? Here’s one I found earlier:
High Level Technique
Going back to my title screen; at a high level we’re doing it in 2 stages like this:
- Draw the plasma effect to a texture surface
- Draw the texture surface to the screen but use the alpha channel on the ‘GunSoul’ lettering sprite to only allow drawing to the inside of the letters - we’ve already carefully set our alpha channel in this sprite!
At this point I was going to say that I took the alpha channel ‘cookie cutter’ or dynamic mask technique from a Gamemaker tech blog and just point you to it. However, it seems it’s fairly old and has been taken down by YoYo games for some reason. So I’ll split this devlog into 2 parts.
I’ll continue with the Plasma effect now and cover the dynamic alpha mask in the next devlog.
Ok, with that said, let’s get into it and talk about the plasma effect...
Plasma Effect Intro
We’re going to do this by rendering onto a texture surface using a shader.
Let me apologise at this point for bringing maths into this. Don’t worry, it’s nothing that needs Stephen Hawking levels of maths ability and if you remember the basics of sine waves from your secondary school or high school maths classes then you’ll be fine.
Ok, so if you remember your sine wave looks like this:
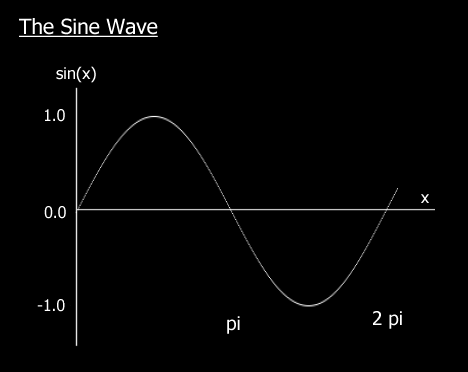
And our shader code is going to use this to draw the squiggly pattern onto our texture.
But let’s build up slowly.
First let’s just draw a greyscale sine pattern across the texture. Not that we’re going to draw this wavy line though - the sine wave indicates the brightness of the pixels. So as we move across the screen and the sine wave value increases then the pixels will be brighter.
But drawing directly to the screen or video memory is slow with Gamemaker so how are we to do it and maintain a decent speed? At this point I’m going to have to digress a little onto shaders…
Very briefly, a shader is a bit of code that’s run on the GPU that sets the colour of each pixel on the target which in this case is our texture surface. In GameMaker this is done using GLSL ES code. You actually need 2 of them; a vertex shader and a fragment shader. It’s this fragment shader which sets the colour of each pixel and is the one we need to modify. I’m going to assume you have a passing familiarity with all this and just continue. But if you’re completely confused then you can pause, go read the GM Studio manual on shaders to get a primer and then come back. But I wouldn’t worry about it too much and I’d just carry on.
Ok, back to the sine wave...
So if we try this fragment shader code which uses the sine function:
#define PI 3.141592
uniform float time;
varying vec2 v_vTexcoord;
varying vec4 v_vColour;
void main() // - SINE WAVE ALONG THE X AXIS ONLY
{
    float v = 0.0;
    vec2 c = v_vTexcoord;
    v = sin(c.x * 2.0*PI);
    vec4 col = vec4(v, v, v, 1.0);
    gl_FragColor = col;
}
Here we are storing the results of the sine function in 'v' and then using 'v' as our RGB colour values for the pixel. We’re only using x as an input to the sine function so the grey only varies with x. When the sine function is at a high point then we get white, if it’s at a low point we get black and some shade of grey as it varies in between. Here it is:

And of course we can do the same with y just by using c.y rather than c.x inside the sin function.
We can combine x and y together to make the lines on a slope. So if we set v like this:
v = sin((c.x + c.y) * 2.0*PI);
we get:

Or we can take the sines of x and y separately to create a kind of ‘fringe’ pattern:
v = sin(c.x) + sin(c.y); // a 'fringe' pattern
We can combine the 2 in another way to create a circle.
Again, apologies for the maths but here we are using Pythagoras theorem. In this case we’re using the square root of the sum of the squares of x and y to get the distance from the centre of the texture. And we’re basing our brightness value on that distance rather than just x or y.
void main()
{
float v = 0.0;
vec2 sf = vec2(3, 3);
vec2 offset = vec2(-0.5, -0.5); // offset the centre of the circle from the top left hand corner
vec2 c =  vec2(v_vTexcoord.x + offset.x, v_vTexcoord.y + offset.y) * sf;
v = sin( sqrt( c.x*c.x + c.y*c.y) * 2.0*PI );
gl_FragColor = vec4(v, v, v, 1.0);
}

Now let’s go back to just varying with x. But now we’ll include a time component. This is how we’re going to make it move.
void main()
{
float v = 0.0;
vec2 sf = vec2(3, 3);
vec2 c = v_vTexcoord * sf;
v = sin((c.x + time) * 2.0*PI);
vec4 col = vec4(v, v, v, 1.0);
gl_FragColor = col;
}
The time variable is updated each frame by some GML code outside of our shader and will increase by 1/60 if the framerate is at 60fps. The end result is that we advance through the sine wave function and it appears to move to the left:
But if we multiply by our time factor rather than adding it then we get a kind of zoom effect.
v = sin((c.x * sin(time))* PI);

And we can do the same with our circle function to make that move:
v += sin(sqrt(c.x*c.x + c.y*c.y + 1.0) + time); // circles

None of these look very ‘plasmary’ on their own but if we use all the effects at once then we get this. Here I’ve just added them together:
v += sin(c.x + time) + sin(c.y + time / 2.0); // a 'fringe' pattern
v += sin((c.x * sin(time / 2.0)) + (c.y * cos(time / 1.1)) + time); // zooming and rotating bars
v += sin(sqrt(c.x*c.x + c.y*c.y + 1.0) + time); // circles
vec4 col = vec4(v, v, v, 1.0);
This looks ok but it’s just grey. This is because we are using the same value of 'v' for the Red, Green and Blue values in our RGB 'col' variable. We can change these amounts by using v again as the input for different functions in each R, G and B:
vec4 col = vec4(0.1 + sin(v * PI) / 2.0, 0.0, 1.5 + sin(v * 2.0*PI), 1.0);
Here I’ve used yet more sine functions in the different RGB components of our colour instead of just using v in all 3 RGB components. And I wanted a bluey purple theme to the plasma so I've kept Green to 0. This gives this result:
I think that brings us to a good place to stop. We have a plasma effect rendering to a texture. In the next video I’ll go into how we can use the alpha mask to constrain the rendering to within our GunSoul lettering rather than drawing the full square texture on screen.
Thanks for reading (or watching if you went off to see the YouTube vid!) and I'll see you in the next one.
BarrowBloke
Leave a comment
Log in with itch.io to leave a comment.